Step 1) Sign in using your recently create login details at this link
Step 2) Click the VENUES page and click your venue title – or click here
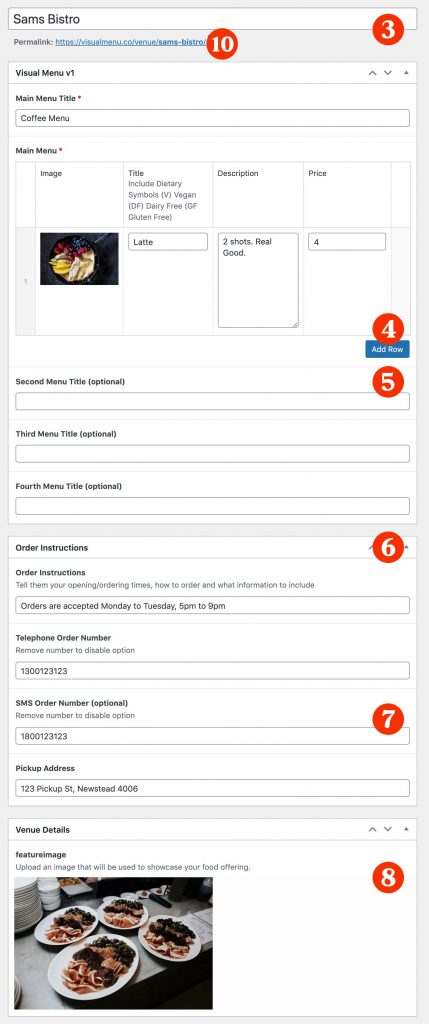
Step 3) Give your first menu a title
Step 4) Click ADD ROW to create menu items then upload image (if applicable) title, description, price. Repeated as needed
Step 5) If you have a second menu, e.g. Lunch, fill in the title of the second menu. Repeat for up to four menus
Step 6) Fill in the ‘Order Instructions’ and order contact details
Step 7) Ensure the venue address is address
Step 8) Upload a ‘Feature Image.’ This is the image that will represent your business at the top of your menu and in our directory (coming soon)
Step 9) When finished, scroll to the top right of the page and click ‘PUBLISH’
Step 10) Copy the link (permalink) at the top of the page to share it via your website and social media accounts.